Pierogi, those delightful little pockets of dough filled with savory or sweet goodness, are a cornerstone of Polish cuisine. But what happens when you’ve made a huge batch, or have leftovers from a satisfying pierogi dinner? Freeze pierogies to enjoy them later! It’s a fantastic way to enjoy that authentic Polish flavor anytime, without the effort of making them from scratch.
Understanding Pierogi Freezing Basics
Freezing pierogi is a fantastic way to preserve these delicious dumplings for future enjoyment. Whether you choose to freeze them raw or cooked, each method has its own set of advantages. Raw pierogi can be frozen for up to 3 months, while cooked pierogi can last up to 6 months in the freezer. The key to maintaining their quality and preventing freezer burn lies in following proper freezing techniques. By doing so, you can ensure that your pierogi remain as tasty and fresh as the day they were made.
Why Freeze Pierogi?
Freezing pierogi is a practical solution. It extends their shelf life significantly. It also saves you time. Imagine having delicious, homemade pierogi ready to cook whenever you want. No need for lengthy preparation – just grab them from the freezer and enjoy a taste of Poland in minutes. Frozen pierogies are convenient and can be easily heated, offering a quick and delicious meal option.

Can You Freeze Pierogi Dough?
Yes, you can freeze leftover pierogi dough. If you have extra dough, don’t throw it away. Shape the dough into a ball. Wrap it tightly in plastic wrap. Then, place it in a freezer bag. This protects it from freezer burn. Thaw the dough in the refrigerator overnight when you are ready to use it. However, making pierogi dough is relatively quick. Freezing is best for leftover dough you don’t want to waste.
Preparing Pierogi for Freezing
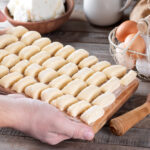
Proper preparation is crucial when it comes to freezing pierogi. If you’re freezing raw pierogi, start by blanching them in boiling water for about 30 seconds. This step inactivates enzymes that can cause spoilage. For cooked pierogi, make sure they cool completely before freezing to prevent the formation of ice crystals. Once your pierogi are ready, place them on a cookie sheet lined with parchment paper, ensuring they don’t touch each other. This method prevents them from sticking together during the freezing process, making it easier to store and use them later.
How to Freeze Pierogi: A Step-by-Step Guide
Freezing pierogi correctly is easy. Following these steps will help maintain their shape, texture, and taste.
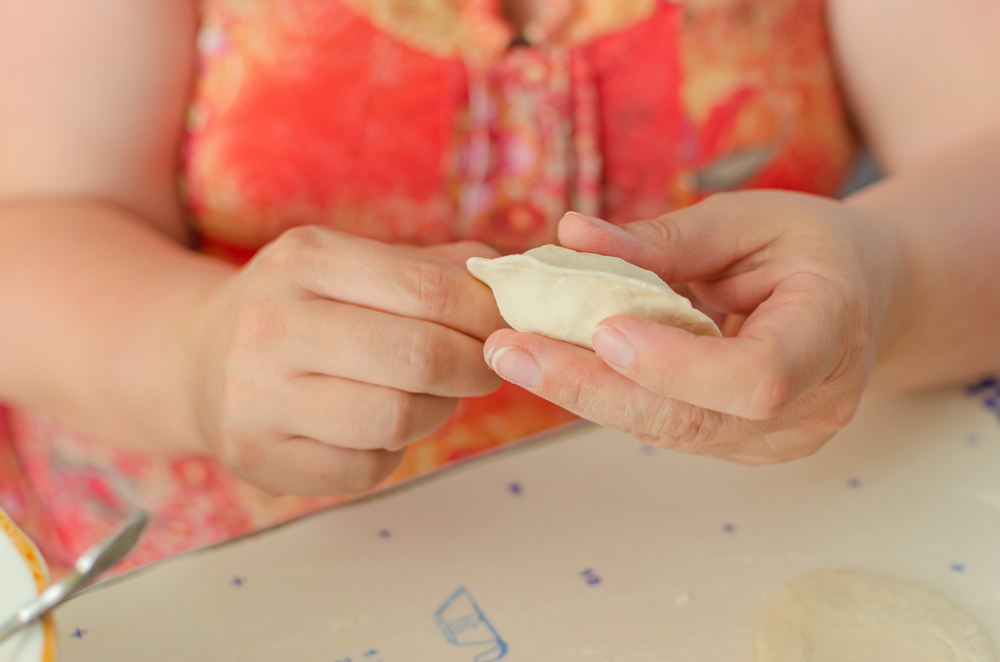
- Prepare the Pierogi: Start with homemade or store-bought pierogi. If making them from scratch, prepare your dough and chosen filling. Fill and shape the pierogi as you normally would. Before freezing, you can brush the pierogi with melted butter to enhance their flavor.
- Cook or Blanch: This step is important. It prevents the pierogi from becoming brittle and cracking in the freezer. You have two choices:
- Fully Cook: If you are unsure how many you will freeze, cook them completely.
- Blanch: If freezing a large portion, blanch them in boiling water for about 30 seconds. This partially cooks the dough. It makes it less likely to be damaged during freezing.
- Cool and Dry: After cooking or blanching, spread the pierogi on a baking sheet lined with parchment paper. Make sure they are not touching. Let them cool completely. This prevents excess moisture, which causes freezer burn.
- Pre-Freeze (Flash Freeze): Put the tray of cooled pierogi in the freezer. Freeze them for 2-3 hours, or until the outside is solid. This “flash freeze” prevents them from sticking together. Freezing them individually first makes it easier to take out only what you need later.
- Package for Long-Term Storage: Once individually frozen, move the pierogi to a freezer-safe bag or airtight container. If you have different fillings, store them separately. Label the bags for easy identification.
- Freeze: Place the bag or container in the freezer. Store pierogi in the coldest part of your freezer for best quality.

Freezing Raw Pierogi
Freezing raw pierogi is a straightforward process that ensures you have a ready supply of these tasty dumplings. Follow these steps for the best results:
- Blanch the pierogi in boiling water for 30 seconds to inactivate enzymes.
- Use a slotted spoon to remove the pierogi from the water and place them on a cookie sheet lined with parchment paper.
- Ensure the pierogi are not touching each other to prevent sticking.
- Place the cookie sheet in the freezer and let the pierogi freeze for at least 2 hours, or until they are frozen solid.
- Once frozen, transfer the pierogi to a freezer bag or airtight container. Press out as much air as possible before sealing to prevent freezer burn.
How to Freeze Homemade Pierogi
Freezing homemade pierogi is similar to freezing store-bought ones. However, consider these points:
- Filling: Most pierogi fillings freeze well. Fillings with high water content, like sauerkraut, might release moisture when thawed. Squeeze out extra liquid from these fillings before assembling the pierogi. A thicker dough can also help prevent sogginess.
- Blanching: Blanching homemade pierogi is very important. It seals the edges. It prevents filling from leaking during cooking.
- Cooling: Make sure the pierogi are completely cool and dry before freezing. This prevents them from sticking. You can cool them faster by placing the baking sheet in the refrigerator briefly.
For a traditional touch, use cold mashed potatoes as a filling to avoid a mushy texture.
Addressing a Misconception: Some people believe potatoes don’t freeze well. This is not true for pierogi. Potatoes freeze perfectly fine in pierogi. Feel free to use your favorite potato-based fillings.
Storing Fresh Pierogi
If you plan to cook your fresh pierogi within a few days, proper refrigeration is key.
- Dusting with Flour: Lightly dust the pierogi with flour. It will prevent sticking.
- Seperating the layers: Use parchment paper to separate layers of pierogi.
- Using Airtight Containers: Use airtight containers. This prevents drying out.

Pierogi Shelf Life: Fridge vs. Freezer
Knowing how long pierogi last is important for safety and taste.
| Storage Method | Uncooked Pierogi | Cooked Pierogi |
|---|---|---|
| Refrigerator | 2-3 days | 3-5 days |
| Freezer | Up to 3 months (homemade) / Up to 18 months (commercially frozen) | Up to 3 months |
Important Notes:
- Unopened store-bought pierogi can stay in the refrigerator for up to two weeks.
- Commercially frozen pierogi might have a longer freezer life (up to 18 months). This is due to the Individual Quick-Freezing (IQF) process.
- Always use airtight containers or freezer bags. This maintains freshness.
- Trust your senses. Discard pierogi with a bad smell, discoloration, or slimy texture.
- Avoid repeated freezing and thawing.
Should I Boil Pierogi Before Freezing?
You can freeze pierogi raw, but blanching them briefly before freezing is better. It offers these benefits:
- Prevents Cracking: Blanching slightly cooks the dough. This makes it less likely to crack.
- Reduces Cooking Time: Blanched pierogi cook faster.
- Improves Texture: Blanching sets the shape. It prevents them from becoming mushy.
Tip: Add a little oil to the boiling water if the pierogi stick together.
For added flavor, you can also fry the pierogi in a mixture of butter and olive oil after boiling.
Choosing Your Freezing Method
You have three main options:
- Freezing Raw: This is fastest. Pierogi may crack more easily. They also take longer to cook.
- Blanching Before Freezing: This is the recommended method. It prevents cracking. It reduces cooking time. It improves texture.
- Fully Cooking Before Freezing: This is good for ready-to-eat pierogi. However, they may become slightly softer after freezing and reheating.
The best method depends on your preference.

Tips and Tricks for Freezing Pierogi
- Use a Baking Sheet: Always freeze pierogi in a single layer on a baking sheet first. This prevents sticking. A silicone mat also works well.
- Consider Styrofoam Trays: Styrofoam trays are a good alternative to baking sheets.
- Don’t Overcrowd: Leave space in freezer bags or containers. This allows for air circulation. It helps prevent freezer burn.
- Vacuum Sealing: For long-term storage, use a vacuum sealer. This prevents freezer burn and extends shelf life.
- Label and Date: Label with the date and filling type. This helps you keep track.
- Thaw in the Refrigerator: Thaw frozen pierogi in the refrigerator overnight. This allows for even thawing.
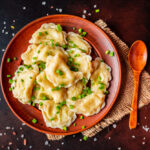
- Serve with Sour Cream: Serve your reheated pierogi with a dollop of sour cream for an authentic Polish experience.
Common Mistakes to Avoid When Freezing Pierogi
Freezing pierogi can be simple, but there are common mistakes that can compromise their quality. Here are some pitfalls to avoid:
- Not Blanching Raw Pierogi: Skipping this step can lead to spoilage. Blanching helps inactivate enzymes that can degrade the pierogi.
- Not Cooling Cooked Pierogi Completely: Failing to cool them fully before freezing can cause ice crystals to form, affecting texture and taste.
- Not Using Parchment Paper or a Cookie Sheet: This can result in pierogi sticking together, making them difficult to separate later.
- Not Removing Air from Storage Bags: Excess air can lead to freezer burn, which negatively impacts the flavor and texture of your pierogi.
- Not Labeling Containers: Always label your freezer bags or airtight containers with the date and contents. This helps you keep track of how long they’ve been stored and prevents confusion later.
By following these tips and avoiding these common mistakes, you can ensure that your frozen pierogi remain fresh and delicious for months to come.
Reheating Frozen Pierogi
You have several options for reheating thawed pierogi:
- Boiling: Boil salted water (about 6 quarts per dozen pierogi). Add pierogi. Cook until they float, then for 3 more minutes.
- Pan-Frying: Heat butter, oil, or both in a frying pan over medium heat. Add pierogi. Cook, flipping until golden brown.
- Baking: Preheat oven to 400°F (200°C). Place pierogi on a baking sheet. Bake for 14-20 minutes, or until heated through. Brush with butter or oil for extra flavor.
- Deep-Frying: Heat oil in a deep fryer. Fry pierogi for 2-4 minutes, or until golden brown. Drain on paper towels.
- Frying After Freezing:If you froze your pierogi after fully cooking them, frying is great way to make them crispy.

Conclusion: Enjoy Pierogi Anytime!
Freezing pierogi lets you enjoy them whenever you want. Following these steps ensures they stay delicious. Stock your freezer with these Polish treats. Enjoy a taste of homemade goodness any day!
Experiment with fillings and cooking methods. Find your favorite way to enjoy frozen pierogi. Whether boiled, pan-fried, baked, or deep-fried, reheating is easy. Pan-frying with butter and onions is a personal favorite – perfect comfort food!
Ready to have a delicious Polish meal on hand at all times? You can easily buy pierogi online and use this freezing guide to keep enjoying the taste of perfect quality dumplings. Get those pierogi in the freezer and enjoy the convenience! Happy cooking!